


Google Maps Satellite Street View is a fantastic tool that lets you explore places from the comfort of your home. Whether you’re planning a trip, checking out a new neighborhood, or just curious about a location, Street View makes it easy to see what a place looks like. This guide will help you become a pro at using this feature, so you can navigate and explore like a local.
Key Takeaways
- You can access Street View by searching for a location or dropping a pin on the map.
- Navigate through Street View by dragging the screen or using the arrows.
- Preview directions with Street View to see your route step-by-step.
- Sharing Street View images is simple with the built-in share feature.
- You can report issues in Street View to help improve the service.
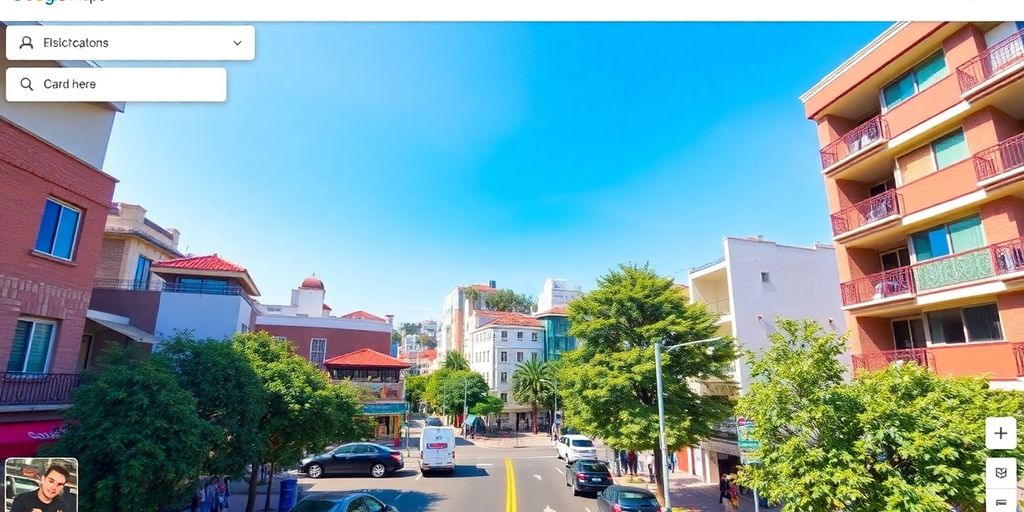
Get to Street View in Google Maps
Navigating to Street View on Google Maps isn’t rocket science. It’s all about knowing the simple steps. Let’s break it down.
Search for a Place or Drop a Pin
When you open Google Maps on your phone, you’ve got a couple of easy options to start. First, you can type in a location name in the search bar. Alternatively, you can drop a pin by tapping and holding a spot on the map. Here are some quick steps:
- Open Google Maps on your Android phone or tablet.
- Find a spot by either searching or long-pressing on the map to drop a pin.
- Once the pin appears, look for the little thumbnail with a Street View icon.
Always remember that a steady tap sets you on the right path.
Tap on a Place Marker
Another way to lead yourself into Street View is by using place markers. Just tap on a marker that catches your eye. Then, check the bottom of the screen for a list of details about that location. This method can be handy if you’re exploring a well-known area or trying to check out nearby landmarks.
- Open your app and spot the markers around your area.
- Tap on a marker and then touch the associated place name or address.
- Look for and select the Street View thumbnail to jump directly in.
For a quick tip on photo navigation during this part, glance at Street View tips to ensure you’re on the right track.
Use the Street View Layer
The Street View layer is another great feature. By switching this on, Google Maps highlights blue lines where street-level images are available. This visual cue can help you easily plan your route.
- Open the app and tap on the Layers button at the top.
- Select the option for Street View to see blue lines on the map.
- Tap any blue line that appears near your area of interest to jump into that view.
Sometimes, it’s the simplest options like enabling a single layer that gives you access to a world of detail.
With these steps, you can easily immerse yourself in Street View and take a closer look at the places around you.
Explore Street View in Google Maps

Drag to Navigate
Using the drag feature feels almost like you’re physically moving through the space. You can click, hold, and drag the view to see different angles of a place. This interactive approach makes your journey feel closer to reality.
Some helpful tips for dragging include:
- Press and hold on the screen before moving your finger or mouse.
- Adjust your viewing angle by dragging slowly.
- Experiment with different speeds to control movement smoothly.
Remember, if you ever feel lost, check out the Maps guide for more insight.
Use Arrows for Movement
The arrow buttons let you travel to connected views with a single tap. Rather than dragging, you can click on these directional cues to automatically shift forward, backward, or to the side. Below is a simple table that outlines how the arrows work:
| Arrow | Action |
|---|---|
| Up | Move forward |
| Down | Move backward |
| Left | Pan left |
| Right | Pan right |
This method is straightforward and can make your experience feel more like moving down a predetermined path.
Switch to Landscape Mode
Changing to landscape mode can provide a more expansive view that makes it easier to see the surrounding area. This is especially useful on mobile devices.
Here are a few steps to shift to landscape mode:
- Rotate your device so it lies horizontally.
- Tap on the landscape mode button if available.
- Enjoy the wider perspective that shows more context of the location.
It’s important to note that switching orientations might reset your position slightly, so a quick re-calibration might be needed if you’re in the middle of exploring.
Each of these methods provides a distinct way to move through Street View, giving you flexibility depending on your preference. For additional assistance on entering destinations and getting around, don’t forget to check the Maps guide.
Preview Directions in Street View
Enter a Destination
Start by typing the name, address, or a notable spot into the search bar. Soon enough, you’ll see your destination pop up on the map, confirmed by a small icon indicating readiness. This step sets the whole process in motion. If you spot any uncertainty, try tapping on the find route option so you’re sure everything is working as planned.
View Step-by-Step Directions
Once you’ve entered a destination, directions appear in clear, numbered steps. Each instruction tells you what to do next – whether it’s turning onto a side street or moving straight ahead. Here’s a short breakdown:
- Open the step details.
- Read what each instruction asks of you.
- Confirm the directions as you move along.
For a quick snapshot of what to expect, consider the table below:
| Step | Instruction | Estimated Time |
|---|---|---|
| Step 1 | Turn right | 1 min |
| Step 2 | Go straight | 3 mins |
| Step 3 | Turn left | 2 mins |
Remember, using Street View to check each step can feel like having a friendly guide right beside you. It offers a natural, immersive feel that plain directions simply can’t match.
If you need more details along the way, I often refer back to the route steps section to double-check before proceeding.
Access Street View for Each Step
For every listed step, there’s typically an option to open that part in Street View. Tap the given image or icon to see your view change to match the surroundings. This small preview gives you an extra sense of where you are. Follow these tips:
- Check the preview image carefully before moving on.
- Use the arrows on-screen to adjust your perspective if needed.
- Scan the details and stay aware of your surroundings.
This practical feature, much like a street guide, helps you feel more confident as you follow your route.
Share Street View Images
Using the Share Feature
If you’re in Street View and want to let someone else see what you’re seeing, try the share feature. Once you locate the share icon (often an arrow or small share symbol), tap it to open the sharing options. The popup will let you choose from several ways to send the image.
Here’s a quick list of what you do:
- Open Street View mode on your device.
- Tap the share icon on the screen.
- Look at the different options that appear.
- Pick the method you like best and follow the prompts.
Remember, Google’s system includes blur protection to hide faces and license plates automatically.
Sharing your favorite Street View moment can be done in just a few steps.
When you share an image directly from Street View, you’re not only sending a static snapshot but a window into a unique moment in time. This simple feature can bridge the gap between a place and someone unfamiliar with it.
Sharing via Social Media
If you want to showcase your find on social platforms, using the share feature is a smart move. Most modern apps will generate a preview of your image, making it look appealing on your social feed. The interface typically offers icons for popular networks, so you can tap the one you need.
Consider these steps:
- Tap the social media icon in the share menu.
- Check the preview to ensure it looks right.
- Add a quick comment or note if you like.
- Post your update for friends and followers.
This process is friendly and usually takes less than a minute.
Copying the Link
If you prefer a bit more control or plan to use the image link in a different context, copying the link is the way to go. After opening the share menu, find the option that says "Copy Link." This method gives you a text string that you can paste almost anywhere.
Here’s how to do it:
- Open the Street View share menu.
- Select the "Copy Link" option.
- Paste the link into your message or document.
- Save it for later use if needed.
Using this approach lets you share exactly what you want, whether it’s through email, text messages, or another platform.
Report Issues in Street View
When you’re using Street View, sometimes you may see images that just don’t seem right. Whether it’s something offensive or outdated, you have a voice in helping keep the map updated and respectful. Here’s a deeper look at different ways to report issues:
Report Offensive Images
If you come across images that contain content you find disturbing or offensive, take a moment to report the problem. Start by locating the exact image in question. Then, use the report option available on the interface – it’s usually found by tapping or clicking on the image details. It only takes one clear report to get things moving.
For a detailed step-by-step process on reporting, check out the report guide.
Some quick steps for flagging offensive content include:
- Identify the problematic image directly on the map.
- Tap on the marker to reveal reporting options.
- Follow the onscreen directions and confirm your report.
Request Updates for Outdated Imagery
Sometimes, the imagery in Street View just isn’t current. For those instances, you can request updates so that the map reflects the present look of a location. Start by pinpointing the outdated area, then locate the option to request an update. Here’s what you can do:
- Confirm that the imagery doesn’t match the current appearance of the location.
- Use the update option to notify the team.
- Provide any details that might help verify the need for a change.
It might not update overnight, but every report helps improve the overall view for everyone.
Submit Feedback for Improvements
If your concern isn’t about offensive content or outdated imagery, you can still help by submitting feedback. Your suggestions not only highlight potential issues but also guide improvements in user experience. Just follow these steps:
- Tap the feedback button once you notice an issue or have more to add beyond a simple report.
- Clearly describe what you think could be improved.
- Submit the detailed feedback and wait for your input to be reviewed.
Below is a table summarizing the three key reporting methods:
| Issue Category | Steps Involved | Expected Response |
|---|---|---|
| Offensive Images | Locate > Report > Confirm submission | Quick review (within 48 hrs) |
| Outdated Imagery | Identify > Request Update > Provide details | Prioritized based on area |
| Feedback for Improvements | Tap > Describe > Submit | Reviewed periodically |
Reporting issues isn’t just a way to fix what’s wrong—it’s a chance to help the community enjoy a better experience on Street View. Every piece of feedback matters and can lead to real change.
By following these simple steps and using the in-app tools, you become a vital part of keeping the map accurate and user-friendly.
Navigate with Live View
Understanding Live View Functionality
Live View mixes the digital world right with what you see around you. In this mode, arrows and prompts pop up on your camera view so you always know which turn to take next. It works by reading the real-life scene and matching it with data online. This technology isn’t magic, but it feels pretty neat when it works. For a more visual rundown, check out AR navigation tips.
Tips for Effective Use
When using Live View, a few common-sense pointers really help make the experience smoother:
- Hold your phone steadily, ideally at a comfortable angle.
- Make sure there’s enough light so the camera catches details around you.
- Pay attention to the overlays and be ready to adjust your direction.
Sometimes, a quick glance at the status of your device can make the whole process easier. Below is a simple table to help you get a grip on using Live View effectively:
| Factor | Recommendation |
|---|---|
| Lighting | Use in well-lit, outdoor areas |
| Device Compatibility | Ensure your phone supports AR |
| User Position | Keep your phone vertical |
For more instructions on setting up these settings, refer to navigation setup tips.
Safety Considerations While Using Live View
Using Live View can be fun, but it’s important not to lose sight of your surroundings. Stay safe first by keeping an eye on what’s around you.
Here are some reminders to help you stay safe:
- Always be aware of your surroundings; don’t just watch the screen.
- Stop using Live View if you find yourself distracted by the app.
- Take regular breaks from the screen to check your environment.
Remember, while the tech is cool, no digital guide replaces good old situational awareness. For further insights on staying smart on the go, see safety tips.
Find Historical Street View Imagery
Google Maps sometimes hides neat old photos in its archives. If you’re curious about the past views of your neighborhood, there are a few tricks that might help you out.
Accessing Archived Images
Old images can be found by looking into the timeline feature on Google Maps. Here’s a quick checklist to try:
- Open the Google Maps app on your device.
- Look for the timeline or archival section under settings.
- Scroll through the available dates to pick the archived images you want to see.
Keep in mind, after the updated Street View changes, some older photos might not be available anymore.
Comparing Changes Over Time
It feels pretty cool to compare the old with the new. Sometimes you can see big differences that tell a story about how a place has grown or changed. Using historical imagery might be your best way to see past changes.
Below is a quick table showing a typical timeline of imagery updates:
| Year | What You Might See |
|---|---|
| 2005 | Basic street captures |
| 2010 | Better clarity, more details |
| 2015 | Notable urban improvements |
You can also follow these steps to make a side-by-side comparison:
- Select two different dates from the archive.
- Open them in separate views if possible.
- Note the differences in road layouts or building appearances.
It’s interesting to see how neighborhoods shift over time. Sometimes, the changes are subtle, and other times they’re a complete surprise.
Limitations of Historical Data
Keep in mind that archived images aren’t always perfect. There are a few limitations you might run into:
- Coverage isn’t consistent everywhere.
- Image quality may be lower than modern pictures.
- Not every area has multiple dates saved.
While exploring old street views can be a fun trip down memory lane, it’s also important to remember that the data available has its limits and might not give a complete picture of the past.
Wrapping It Up: Your Journey Awaits
So there you have it! Using Google Maps Street View can really change how you explore the world. Whether you’re checking out a new restaurant or just wandering through a neighborhood, it’s all at your fingertips. Remember, you can drop pins, tap on markers, and even look back at how places have changed over time. It’s like taking a little trip without leaving your couch. So, go ahead, get curious, and start exploring! Who knows what hidden gems you might find?
Frequently Asked Questions
How do I access Street View in Google Maps?
You can access Street View by searching for a location, dropping a pin on the map, or tapping on a place marker.
Can I navigate through Street View?
Yes! You can drag to move around or use the arrows on the screen to walk in a specific direction.
How can I share a Street View image?
To share an image, tap the share button on the screen, and you can send it via social media or copy the link.
What should I do if I see something inappropriate in Street View?
You can report it by selecting the image, tapping ‘More’, and choosing ‘Report a problem’.
How do I use Live View for navigation?
Open Google Maps, enter your destination, and select Live View to see directions overlaid on the real world.
Is it possible to see historical images in Street View?
Yes, you can access older images by tapping on blue lines and selecting ‘See more dates’ if available.
